Monthly Archives: November 2012

Chowder!

Chowder

Along with the theme of keeping warm, I came up with a brilliant plan to recreate the typical hearty dish of hot San Francisco chowder inside a hollowed-out loaf of sourdough bread. My other half brought back a 1.5 lb loaf of fresh sourdough bread from his business trip in San Francisco, and I went online to read up on New England clam chowder.

The problem with the San Francisco delicacy, is that there are few clams living in the vicinity of San Francisco (recently some have been introduced through aquaculture). The chowder used in the their popular sourdough bowls is straight from a can. The UK, however, is abundant in clams. In fact, this is the perfect time of year to be eating shellfish in the UK, as many fish are out of season and are not sourced locally. For a sustainable dinner in winter, bring on the scallops and mussels and clams.

I had great intentions of buying my clams at the Billingsgate fish market, which has been in London for the past 800 years, but getting up before dawn proved more of a chore than I had initially thought. I scrapped the idea and walked up to the Hampstead fishmonger instead at the civilised hour of noon, ringing ahead to make sure they were in stock. The premises are tucked away down a narrow hallway next to the Hampstead Community Centre, just a couple buildings down from a crepe stand.

I hope I’m pronouncing it right!

Clam chowder, serves 2-4 (adapted from www.livestrong.com)

Ingredients

1 kg / 2 lb live clams
6 fl. oz. / 3/4 cup / 175ml dry white wine
3-4 chopped bacon slices (a.k.a. lardons) + olive oil for frying (I used garlic-infused olive oil)
2 onions
1 garlic clove
2 Tbsp plain flour
3 large potatoes (I used 6 medium red potatoes)
7 fl. oz / 200ml heavy cream / double cream
1 sourdough loaf per person (instead of soup bowls), with chopped flat leaf parsley for garnish (we shared a giant one between two people and spent a lazy afternoon eating chowder and watching films)

Get your clams from the fishmonger the same day to ensure they’re fresh. Some of mine were still moving, wobbling from side to side in the cold tap water, which was disconcerting, but proved they were fresh. Fresh clams should still be alive.
1: Rinse clams with cold tap water. Pick up each clam in turn and remove any weed and dirt. Discard any smashed or wide open clams. Put the clean clams in another bowl.
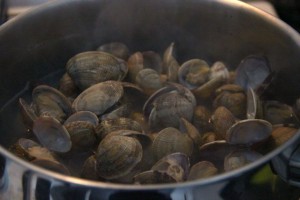
Clam broth
2: Boil a pint / 570ml water and the white wine together in a large pot. Put the cleaned clams into the pot and cover. Cook at a hard boil for two minutes. Check to see that most of the clams have opened. Hold the pot over a colander and drain — catching the liquid in a measuring cup. Remove the flesh from each shell and set it aside (I used a grapefruit spoon to separate the insides from the shell).


3: Fry bacon / lardons in olive oil in the bottom of your stockpot until they turn crispy and browned. Use a high-sided pan or pot. Scoop the bacon from the pan and add two chopped onions and a chopped garlic clove. Cook for four minutes. Sprinkle in 2 Tbsp of plain flour, stirring it into the oil and fat until you get a smooth paste / rue. Cook for four minutes, taking care not to let the paste brown or burn.


4: Add water to the clam liquor in the measuring cup until you have 17 fl. oz. / 0.5L of liquid. Pour this into the bacon pan. Chop three large potatoes into bite-sized chunks. Add to the pot. Bring to the boil and simmer lightly for 10 to 15 minutes, or until the potatoes soften.


5: Pour in heavy cream / double cream. Put the clam flesh into the broth, stir and cook for another three minutes. Serve inside a hollowed-out round loaf of sourdough bread, with a little chopped parsley on top, and use the bread from the inside of the loaf for dipping.

Enjoy!

Comfort food

Happy Thanksgiving everyone! If you’re looking for a savoury alternative to turkey to make for the vegetarian in your life, and want to steer clear of the standard dried out nut roast, read on.

Spoiler

It is the time of year for battening down the hatches, burrowing under the covers a bit longer when the alarm goes off, and taking your blankets with you as you walk around your home. It is cold and dark.

First off, my friend Ems has been blogging fabulous veggie soups for the past month — check out her blog and try the Thai pumpkin if you’re looking for something a bit exotic and in keeping with the season.

A good old school New York Italian vegetarian recipe when you’re looking for comfort food is eggplant parmigiana. This was introduced to me through my former university roommate and best friend Mary, whose mother learned it from her former university roommate. The recipe is just too good not to pass on. Three secrets:

1. Pick your aubergine carefully – make sure the flesh is not dented or squishy
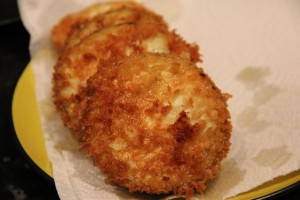
2. As you fry the aubergine slices – make sure to drain them well and replace the kitchen paper if it becomes saturated with oil
3. When in doubt, add more cheese

This time I made it with panko breadcrumbs to try something new, which were lovely and light, though traditional breadcrumbs provide a more even level of breading cover for the slices. I also cheated and got pre-seasoned sauce instead of just tomato plus adding my own herbs. I used Napolina basil & tomato sauce, which I found too sugary, though not enough so to ruin the dish.


Eggplant parmigiana (serves 6) 1 hour prep, 20 min baking time

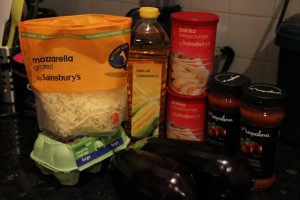
Ingredients

8″ by 11″ pan and frying pan and saucepan

2 large aubergines

1 container of breadcrumbs (approximately 2.5 cups/70g)

2 eggs

400g corn oil for frying (approximately 2 cups)

2 cans/jars passata/tomato sauce

1 Tbsp oregano plus a pinch of any other Italian herbs you like and salt and pepper to taste

250g grated mozzarella cheese (3 cups) for layering

Nutrition estimate for 1/6 = 513 cal, 17g fat, 1.3g salt, 58g carb


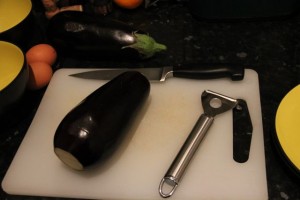
Chop ends

1. Start by chopping off the ends of the aubergines and peeling. I find it’s easier to peel starting from the ends, since the skin is tough and the ends are skinless now.

2. Fill your frying pan with oil to a depth of a little less than a centimetre or half inch – so when the slices go in, the oil won’t quite cover them. You can always add more oil later (if you add new oil later, do it slowly from the side of the pan and turn the heat up for a minute to compensate). Turn the burner up to medium/medium-high.

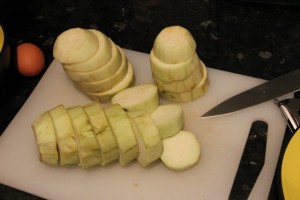
Slice

3. Chop the peeled aubergines in 1.5cm / 0.75 inch slices. Don’t worry if your slices aren’t perfectly uniform — this is a forgiving dish.

Assembly line

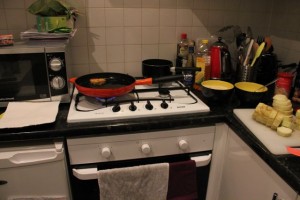
4. Set out your assembly line for frying:  a fork, two small bowls — fill one with breadcrumbs, crack an egg into the other and whisk a little with your fork until yolk and white are combined (if this gets low later, do it again) — , your frying pan (which will be heating up at this point), a spatula, and a plate for the finished aubergine with two pieces of kitchen paper/paper towel on it to soak up any excess oil.

5. Check your oil is hot enough by dropping a bit of egg into it — if it bubbles up to the top in a second or two, it’s ready. You don’t want it bubbling furiously so if that happens turn the heat down and/or add a little fresh oil to modulate the temperature.

6. Set up your saucepan with the sauce in it and toss in herbs.

Frying

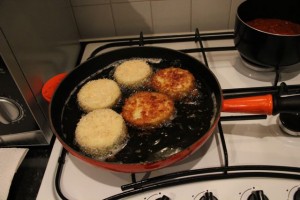
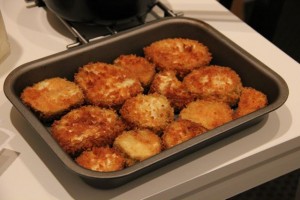
7. Assembly line: pick up first aubergine with a fork, dip in egg, flip with fork to coat, dip into breadcrumbs, flip to coat, set into oil gently. Keep doing this until you have around 5-6 slices in the pan. Then start flipping the oldest slices so they brown on both sides. Now you will be taking out the old slices and setting them on the plate at an angle to drain the oil, turning the remaining slices around in the pan, just like an assembly line, so you know where the oldest slices are, and adding new slices.

Slices

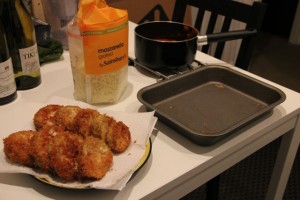
8. As you reach the last new slice, turn on the sauce to cook for the next 4-5 minutes (it doesn’t need to cook really, just be suitably warm). Also set out the cheese and the 8″ by 11″ pan. Also turn the oven on at 200C or 400F to warm up.

Assembly

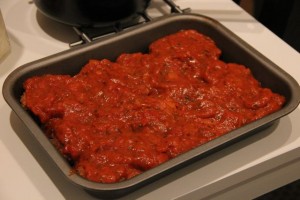
Layer 1

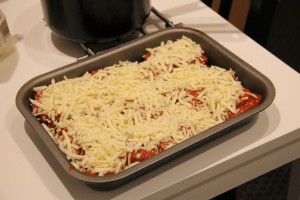
Layer 2

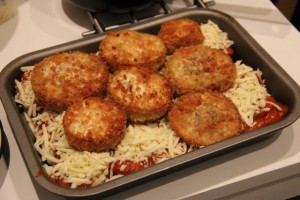
Layer 3

And again

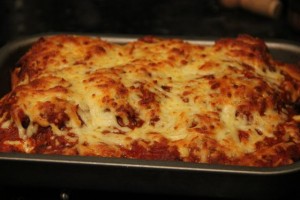
Voila

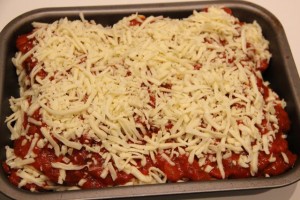
9. Your slices and the sauce should finish around the same time. Then it’s time to play aubergine tetris. Start with the oldest slices first as they’ll be the coolest. Make a layer of aubergine in the bottom of the pan. You can cut them in half if you need to fill gaps. Then a layer of sauce, then a layer of cheese. Do it again and you’re ready to bake.

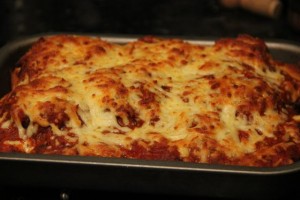
10. Bake it for 20 minutes, or until everything has come together into a delicious gooey cheesy whole.

11. It’s easy to cut with a spatula, like bars. Also, you can save any leftovers in the fridge and they reheat well for up to five days. If there are any leftovers….

One more time

Enjoy!